


High Voltage Electroculture System
In many situations, installing 25-foot-tall antennas or constructing 11-meter pyramid-shaped greenhouses is either impossible or impractical. In these cases, we need to use active devices. Active electroculture devices operate on similar principles as passive ones (antennas), but instead of harnessing natural electric charges, they rely on a man-made power supply.
For this purpose, we recommend the Lemström System.
In 1885, Finnish scientist Selim Lemström made a ground breaking discovery: electrical discharges from wire points could boost the growth of crops such as potatoes, carrots, and celery by an impressive 40% to 70% within just 8 weeks.
The Lemström System consists of a horizontal grid connected to a high-voltage power source, suspended at a height that allows for efficient plowing, weeding, and irrigation without obstruction. The voltage applied to this grid varies between 2kV and 70 kV depending on the height of the grid, the greater the distance between grid and plants the higher the voltage needed.
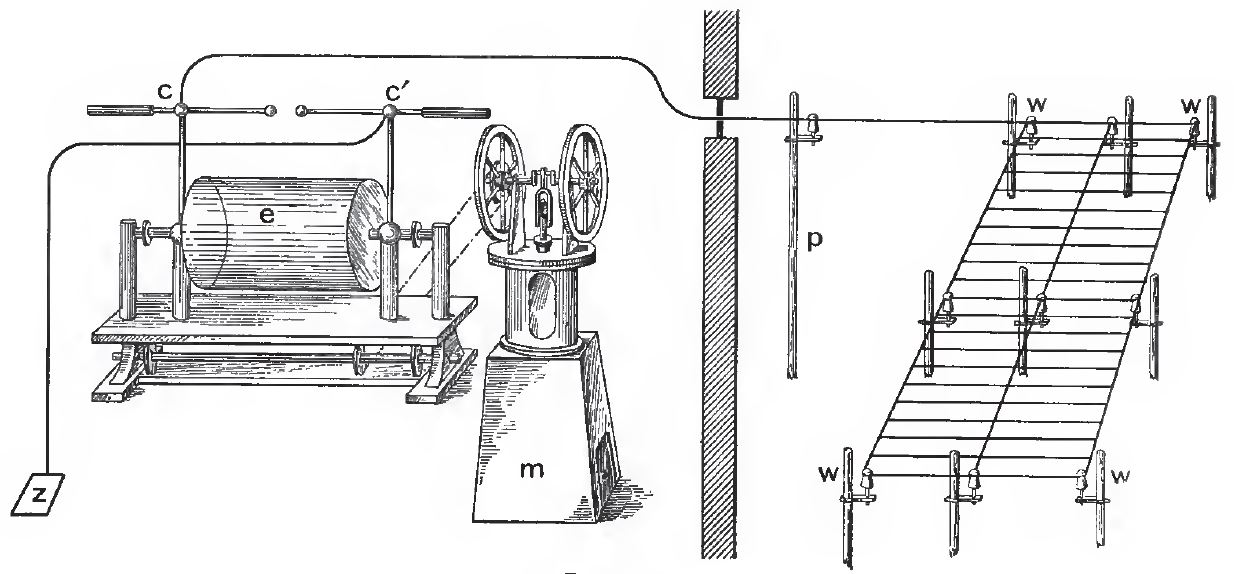
In this image you can see the old style high voltage power supply at the left of the wall and the electrified field on the other side. We can use the same idea with a modern high voltage power supply to accomplish the same results.
Here we describe the setup for a field but it can be used the same in a backyard over rows, beds or planters.
Lemström system setup instructions:
1. Post Installation:
- Install 2.5m long posts with a 6cm diameter by ramming them into the ground to a depth of 0.5m.
- Space the posts 14.3m apart along each side of the field.
2. Insulator Placement:
- Ensure each corner post is equipped with an insulator on the inside (facing the field). Or use PVC pipes instead of metal or wood posts, then there is no need for insulators.
3. Wire Installation:
- Once the insulators are securely fastened, run a medium tension galvanized iron wire (with a diameter of 1.5mm) along the posts and over the insulators.
- After fixing the conducting wires around the perimeter, lay cross-wires (approximately 0.6mm in diameter) across them from one side to the other, spaced at 1.25m intervals. This will result in 8 cross wires covering 10m.
4. Finer Wire Arrangement:
- Position the finer wire at 1m intervals, using small points 2cm long, resembling barbed wire, to secure it.
5. Electrical Connections:
- The wire net should be fully insulated from the posts and connected to the positive pole of the power supply.
- The negative pole should be grounded using a wire and a zinc plate.
6. Height Adjustment:
- Maintain the height of the wire net above the plants at approximately 0.4m at its lowest point. As the plants grow, gradually increase this height by moving the insulators up the poles. This adjustment should only be necessary once or twice.
7. Safety Checks:
- Regularly inspect the wire net to ensure it does not come into contact with the plants.
- Never touch the wires while the system is in operation.
8. Electricity Application Guidelines:
- To avoid harming the plants, limit electrical application, especially during intense sunlight. It is recommended to apply current on sunny days for:
- Four hours in the morning (from 6 am/7 am to 10 am/11 am)
- Four hours in the afternoon (from 4 pm/5 pm to 8 pm/9 pm)
- On cloudy days, the current can be applied throughout the day and even at night when the weather is humid.
- During extremely dry conditions with scorching sun, consider interrupting electricity applications or limiting them to one or two hours per day.

WARNING: High voltage can be lethal. Build entirely at your own risk. If you’re not sure what you’re doing, you should hire a professional for this project.
When working around high voltage, always wear rubber gloves and rubber shoes; one mistake can be deadly.
Now all we are missing is the Power Supply.
If you are setting this up for a very large garden or a field, I recommend buying an off the shelf High Voltage Power Supply.
If you are using it for a backyard garden, then you can easily make your own, see the instructions below.
Materials Needed:
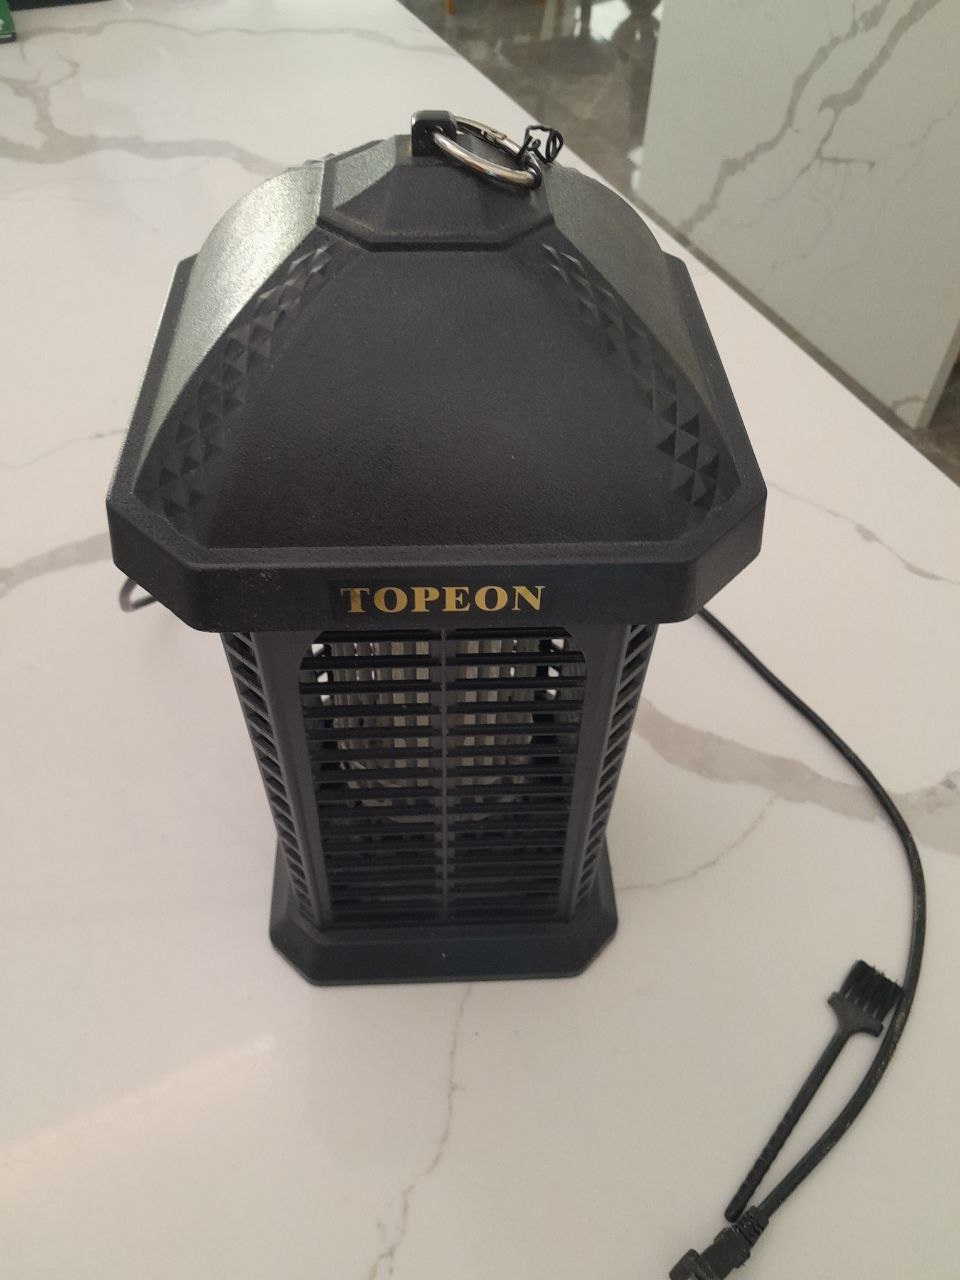
- One mosquito zapper light (similar to those found at chargedgarden.com/zapper/)
- One set of four 20kV high voltage diodes (like those available at chargedgarden.com/hvdiodes/)
- A high voltage capacitor (you will need to construct this yourself; you can find a how to video at chargedgarden.com/hvcap/)
Understanding the Zapper Light:
The zapper light features a UV light bulb at its center, surrounded by a mesh made of two sets of metal rods. These rods are connected to a high voltage AC supply. The UV light attracts insects, and when they try to pass between the rods, they complete the circuit and get electrocuted.
To access the high voltage supply inside the zapper, follow these steps:
Open the Zapper Light:
- Turn the light upside down and remove the screws that secure the top cover to the body of the light.
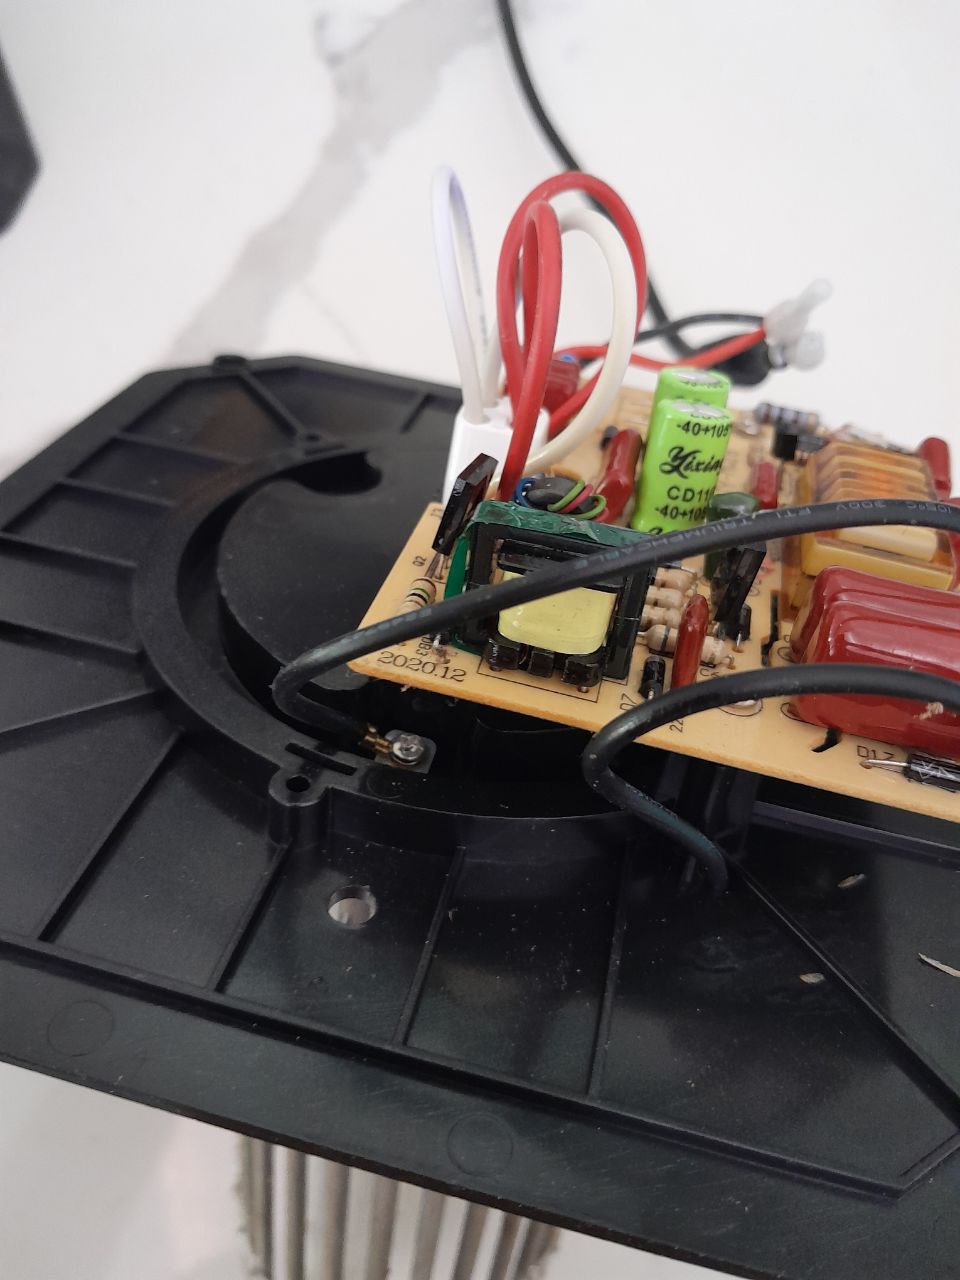
- Carefully lift off the cover to expose the circuit board.
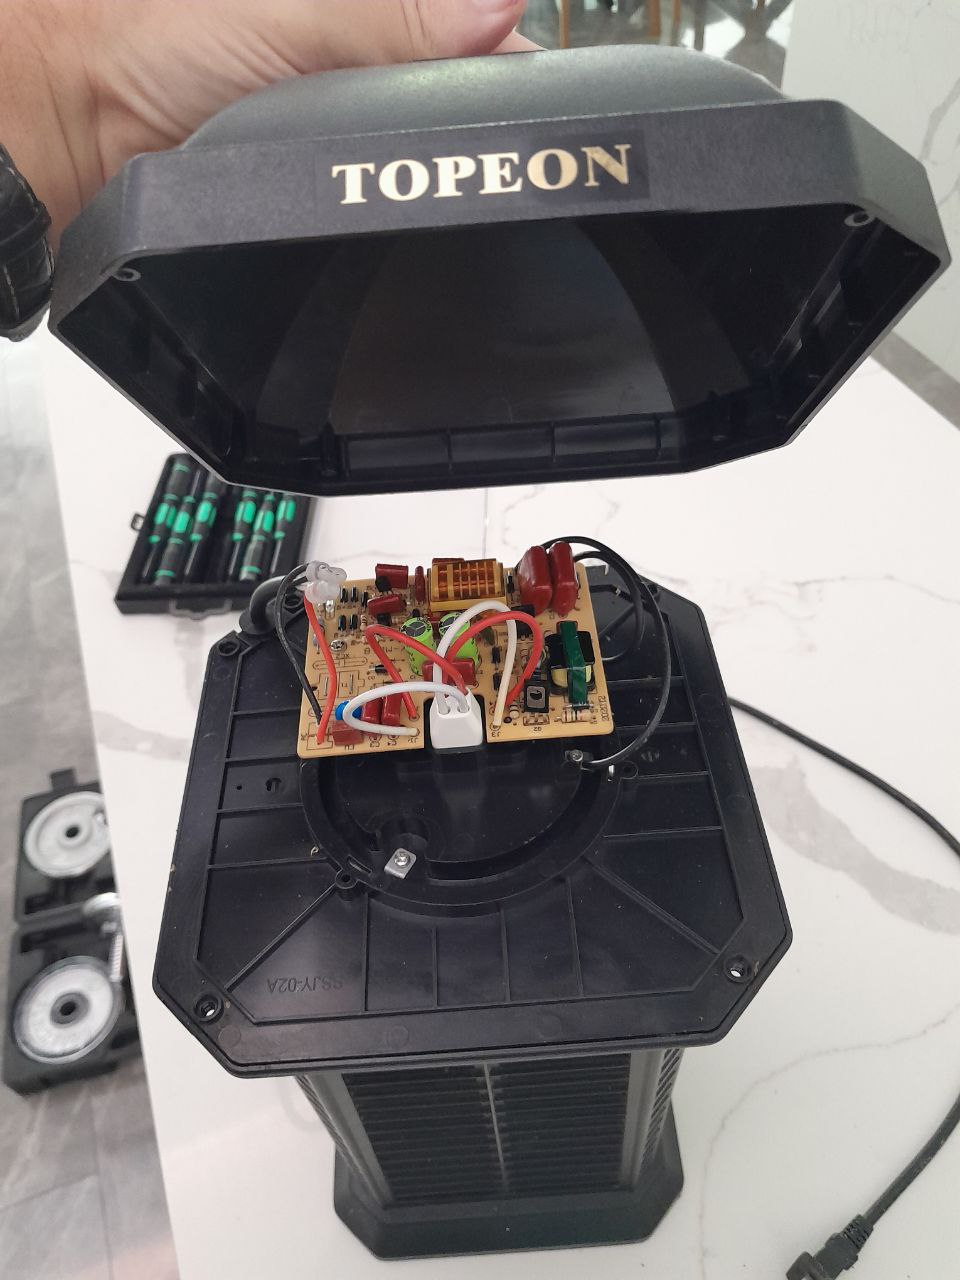
Identify the Wires:
- The black and red cables on the left connect to the power cord, which links to the AC outlet.
- The red and white cables at the bottom center power the fluorescent light.
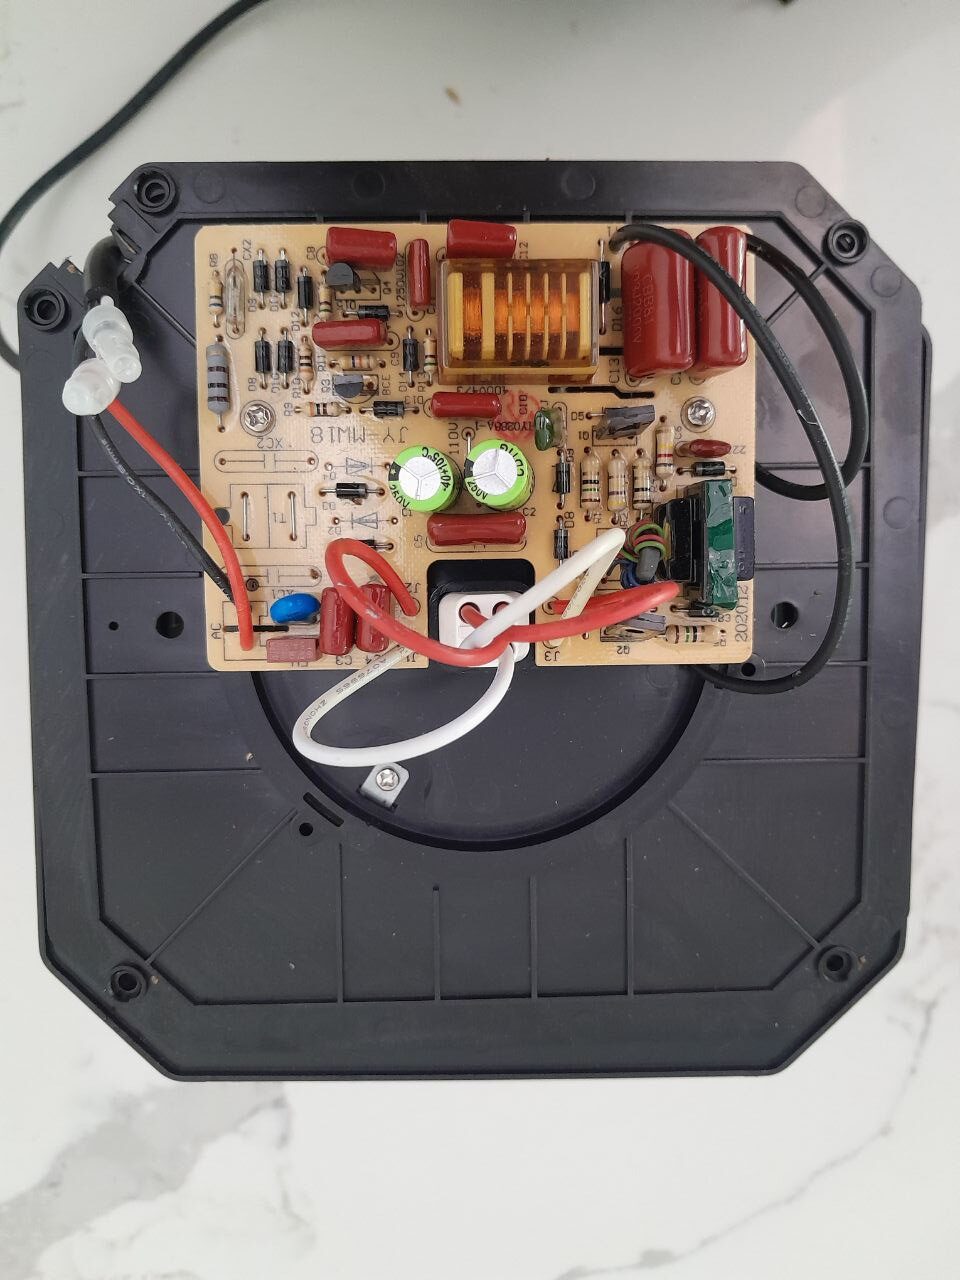
- The two black cables located at the top right of the board are the high voltage AC cables leading to the metal grid that kills the bugs. These are the wires you need to work with.
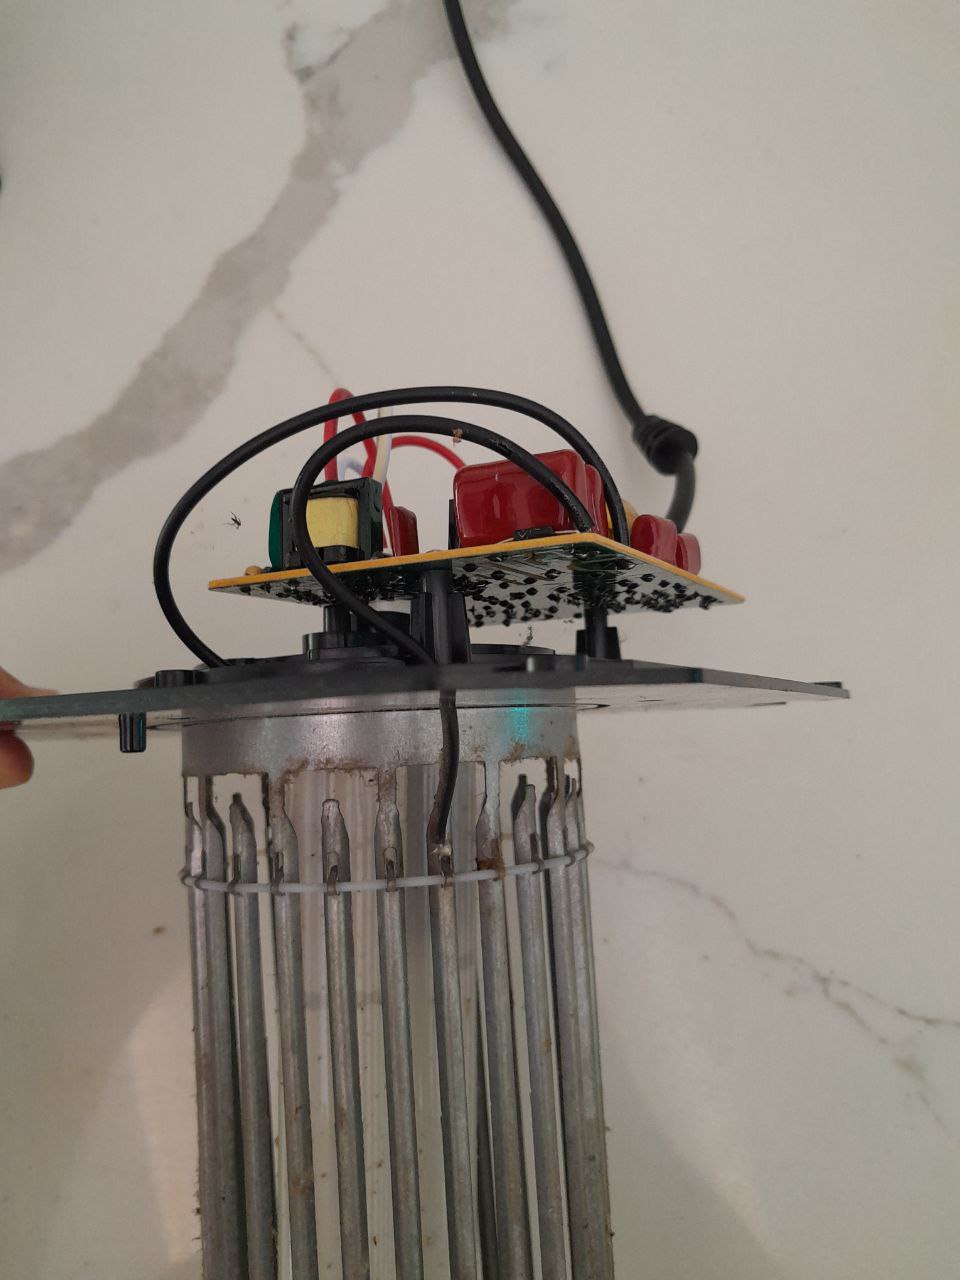
Disconnect the High Voltage Cables:
- One of the black cables is connected to a screw under the board, attaching the top side of the metal grid to the plastic casing.
- The other cable passes through a hole in the plastic and is soldered to the underside of the metal grid.
- Cut these two cables just before the screw and solder points. These will be connected to the rectifier bridge as previously mentioned.
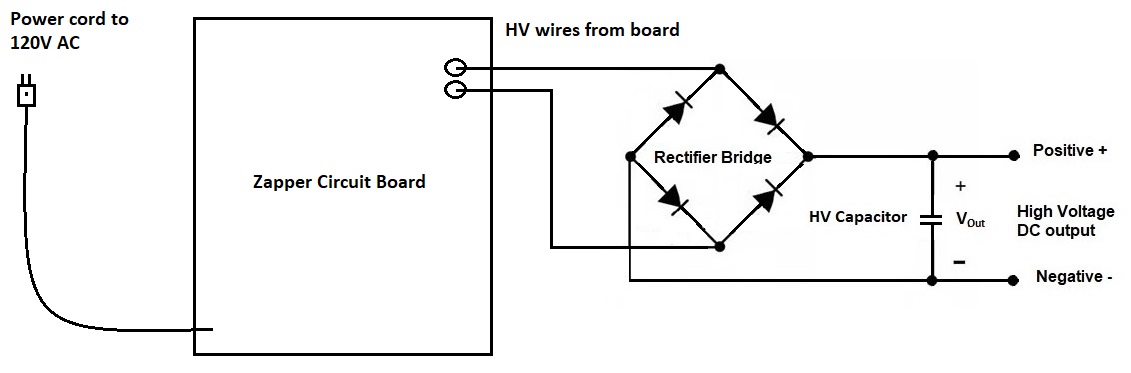
Assembling the High Voltage DC Power Supply:
- Create a rectifier bridge using the diodes.
- Connect the two wires from the board that you previously disconnected from the screw and the metal mesh, to the AC input terminals of the rectifier bridge.
- Finally, connect the high voltage capacitor between the positive and negative outputs of the rectifier.
- Put everything safely in a plastic enclosure, maybe a section of 4 inch PVC pipe with end caps and the AC cord coming out of one end, and the High Voltage DC leads coming out of the other end.
By following these steps, you’ll successfully create a high voltage DC power supply suitable for backyard setups!